From Idea to Reality: A Beginner's Intro Guide to 3D Design, Printing, and Scanning
Learn how 3D modeling, 3D printing, and 3D scanning work together to turn your ideas into real objects. This beginner-friendly guide covers CAD, Blender, digital sculpting, and shows you exactly how to prepare your concept for a professional 3D designer.
12/26/2025
You've got an idea. Maybe it's a replacement part for something that broke years ago and is no longer manufactured. Maybe it's a custom tool that would make your job easier, or a unique gift you can picture perfectly in your mind. The problem? You have no idea how to actually make it.
If that sounds familiar, you're not alone. Thousands of people have great ideas but feel stuck because they don't know how 3D printing works, what CAD software even means, or how to communicate their vision to someone who can build it.
This guide is for you. Whether you've never heard of 3D modeling or you just need a refresher on how the whole process works, we'll walk through everything step by step—from understanding the different types of 3D design to preparing your idea so a professional designer can bring it to life.
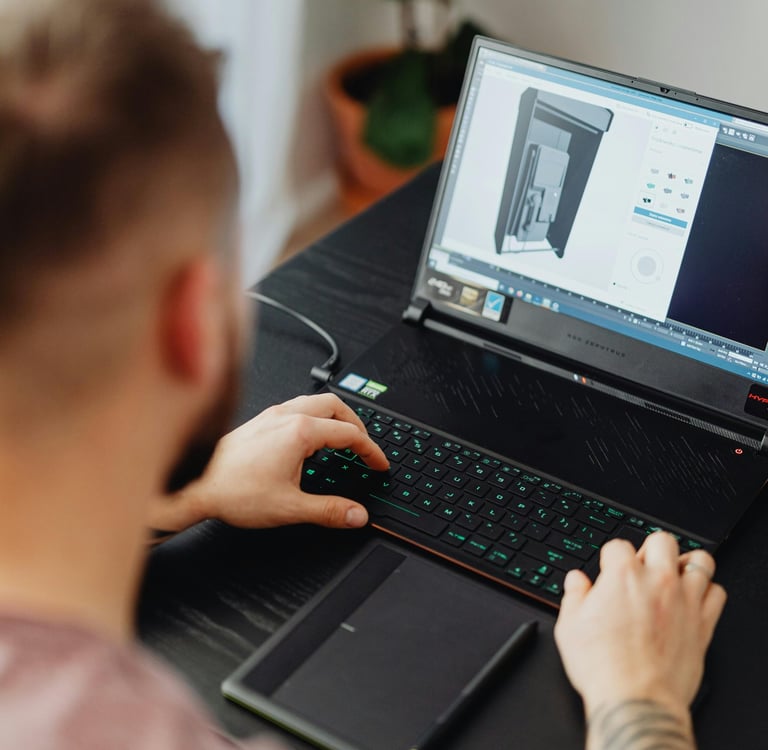
3D modeling is the process of creating a three-dimensional digital representation of an object using specialized software. Think of it like sculpting, but instead of clay, you're working with digital shapes on a computer screen. Once a digital model exists, it can be manufactured in the real world—the file contains all the information a 3D printer needs to create a physical object.
Here's what many beginners don't realize: there are several different approaches to 3D modeling, each suited to different types of projects. Understanding these basics helps you communicate better with designers and appreciate what goes into bringing your idea to life.
What is 3D Modeling?
CAD Modeling: Precision Engineering
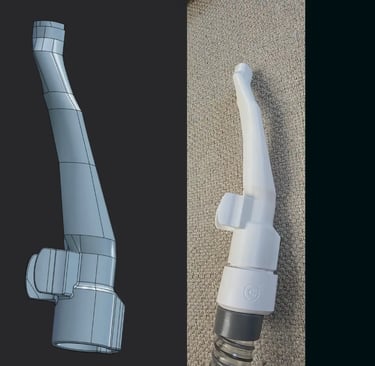
CAD stands for Computer-Aided Design. This approach is all about precision and exact measurements. CAD software allows designers to build objects with specific dimensions, exact angles, and accurate proportions—down to fractions of a millimeter.
CAD is the go-to method for mechanical parts, replacement components, functional tools, enclosures, brackets, and anything that needs to fit precisely with other parts. If you need a replacement knob that threads onto a specific bolt, or a bracket that mounts in an exact location, CAD is the right approach.
Popular CAD programs include Fusion 360, SolidWorks, Tinkercad, Onshape and FreeCAD. New comers there's Plasticity. Some of these programs use what's called "parametric modeling"—meaning you define shapes using measurements and relationships, and you can easily change dimensions later without starting over.
Mesh Modeling: Artistic Freedom
Mesh modeling (also called polygon modeling) takes a different approach. Instead of precise measurements, you work with vertices, edges, and faces to shape objects more freely. This method is popular for artistic projects, characters, organic shapes, and decorative items where exact dimensions matter less than visual appearance.
Blender is the most popular free mesh modeling software, and it's incredibly powerful. Professional studios use programs like Maya and 3ds Max. These tools excel at creating things like figurines, character models, artistic sculptures, decorative pieces, and organic shapes that would be difficult to define with precise measurements.
If you want a custom figurine of your pet, a fantasy creature, or an artistic piece with flowing curves, mesh modeling is typically the best approach.
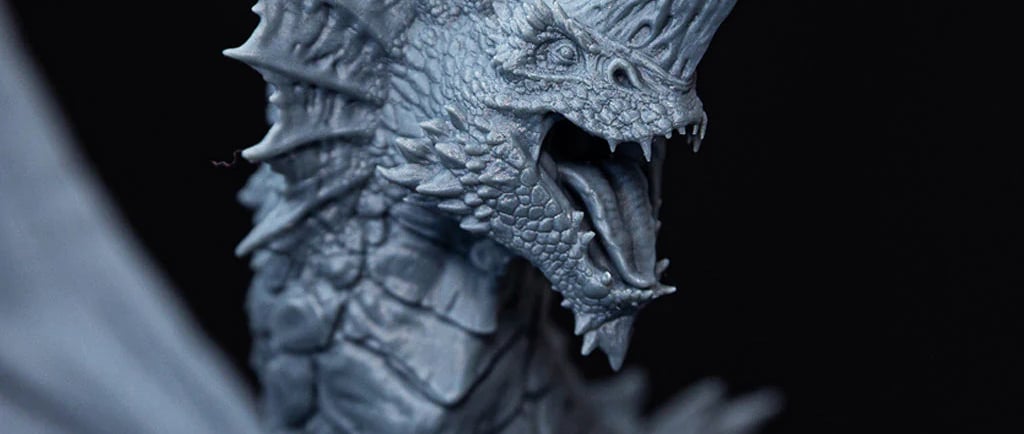
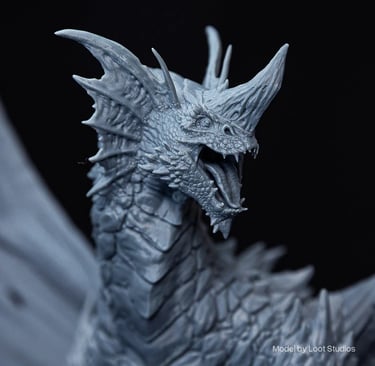
Digital Sculpting: Like Working with Virtual Clay
Digital sculpting is the most intuitive approach for highly detailed, organic work. Imagine working with digital clay—you push, pull, smooth, and carve the surface just like a traditional sculptor would. This method is perfect for creating incredibly detailed models with textures, wrinkles, scales, fabric folds, and other fine surface details.
ZBrush is the industry standard for digital sculpting, though Blender also has powerful sculpting tools built in. Artists use sculpting for highly detailed figurines and miniatures, portrait busts and character faces, creatures and monsters, anything requiring fine surface detail, and artistic pieces where organic feel matters most.
Many complex projects actually combine multiple approaches—a designer might create the basic mechanical structure in CAD, then add organic details through sculpting.
Which Method is Right for Your Project?
You don't need to decide this yourself—a good designer will choose the right approach based on your needs. But here's a quick guide:
Choose CAD when: Your project needs exact measurements, must fit with existing parts, or serves a mechanical/functional purpose.
Choose Mesh Modeling when: You're creating something artistic, decorative, or character-based where visual appearance matters more than precise dimensions.
Choose Digital Sculpting when: You need fine surface details, organic textures, or highly artistic pieces like figurines and miniatures.
Key Takeaway
You don't need to learn any of this software yourself. A professional 3D designer can take your idea—even a rough sketch on a napkin—and choose the right tools to turn it into a precise digital model ready for printing.
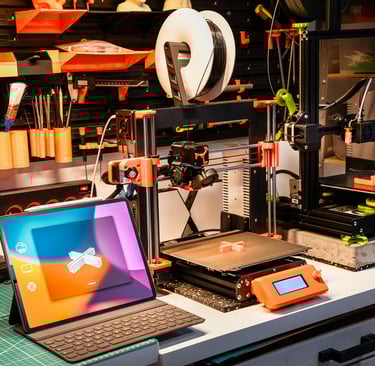
How 3D Printing Works with 3D Design
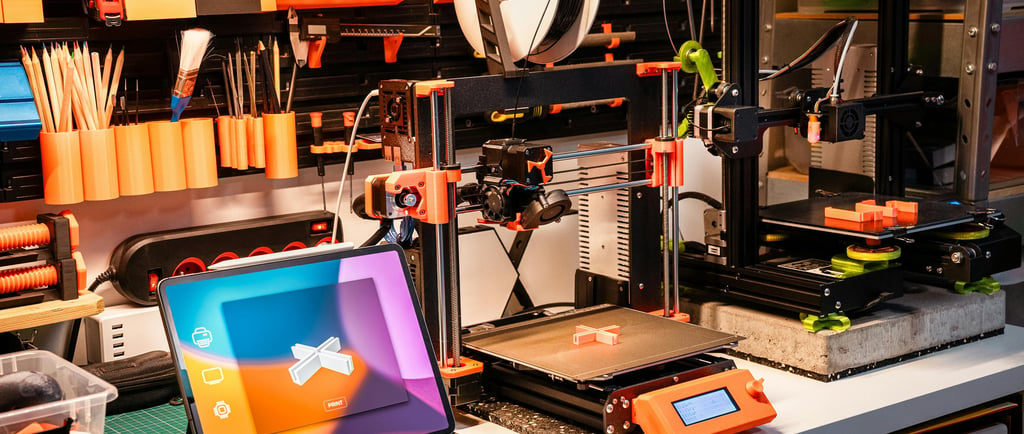
3D printing might sound like science fiction, but the concept is surprisingly simple. A 3D printer builds objects by adding material layer by layer, following the instructions from a digital 3D model.
Imagine building a loaf of bread by stacking thousands of paper-thin slices on top of each other. That's essentially what a 3D printer does, except instead of bread, it uses materials like plastic, resin, or even metal.
The most common type of 3D printing for custom parts and prototypes is called FDM (Fused Deposition Modeling). The printer heats up plastic filament until it melts, then precisely deposits it in thin layers. Each layer cools and bonds to the one below it. After hundreds or even thousands of layers, you have a complete physical object.
Traditional manufacturing often requires expensive molds, minimum order quantities, and long lead times. 3D printing changes all of that. Need just one custom part? No problem. Want to test three different versions before committing? Easy. Need a replacement for something that's no longer made? 3D printing can make it happen.
This technology is especially valuable for custom solutions, one-of-a-kind parts, prototypes, discontinued replacements, and adaptive equipment designed for specific needs.
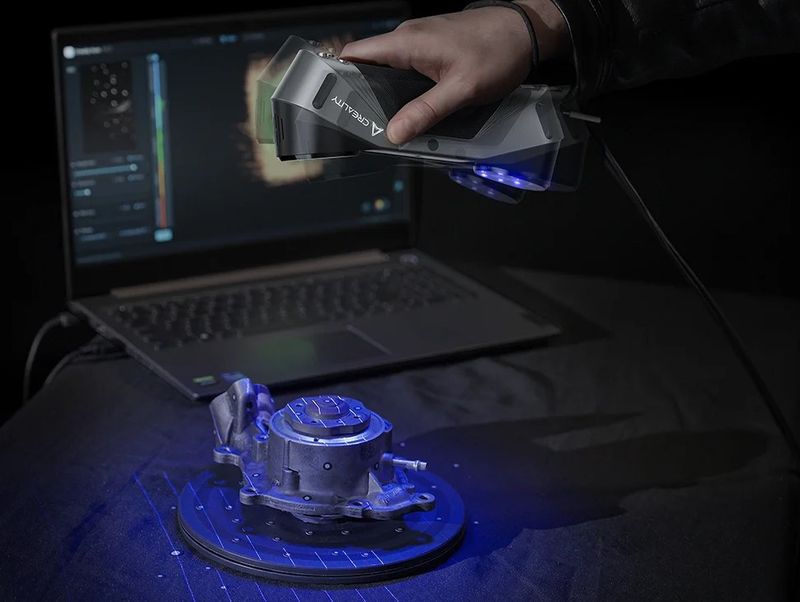
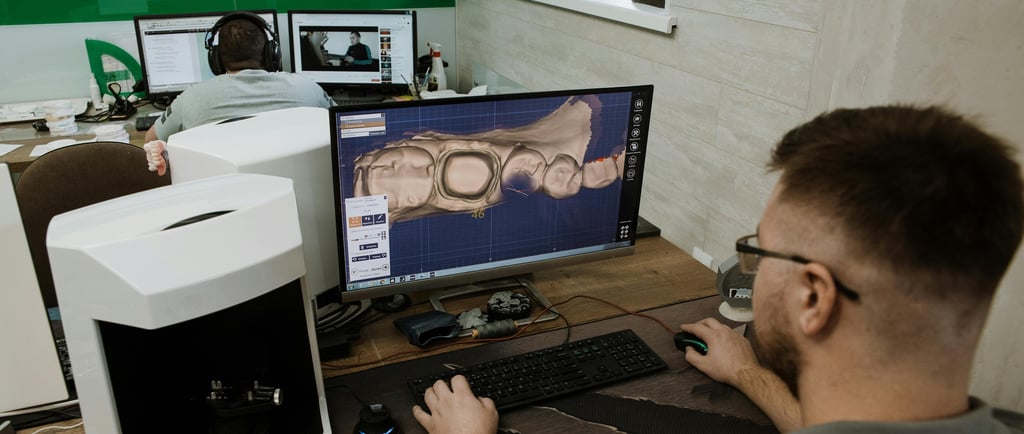
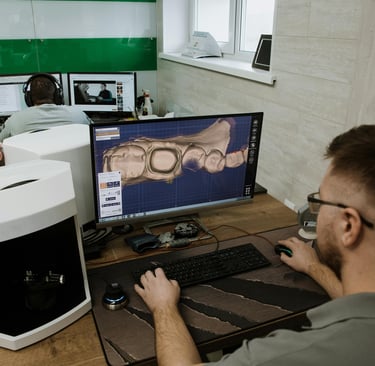
The Power of 3D Scanning with Design
What if you don't have detailed measurements or drawings, but you do have an existing object you want to replicate or modify? That's where 3D scanning comes in.
A 3D scanner captures the exact shape and dimensions of a physical object and converts it into a digital 3D model. It's like taking a photograph, but instead of a flat image, you get a complete three-dimensional file that can be edited, modified, or sent directly to a 3D printer.
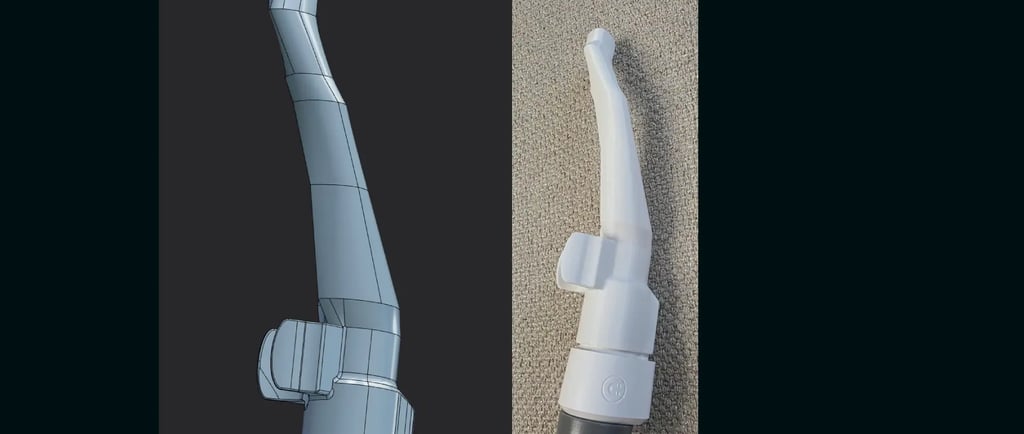
Reverse engineering is one of the most popular applications. Have a broken part with no replacement available? A 3D scanner can capture its exact dimensions, and a designer can use that data to recreate the part—or even improve upon it.
3D scanning is also valuable for replication when you need multiple copies of an existing object, modification when you want to change or improve an existing design, and documentation for creating digital archives of physical items.
How to Prepare Your Idea for a 3D Designer
This is the part most people struggle with. You have an idea in your head, but how do you communicate it clearly to someone who can build it? The good news is you don't need to be an artist or engineer. Here's exactly what helps:
Start with a Sketch (Even a Rough One)
Your sketch doesn't need to be pretty. Stick figures and rough shapes are perfectly fine. The goal is to show the basic form, how different parts relate to each other, and any important features. Grab a piece of paper and draw what you're imagining from multiple angles if possible—a front view, side view, and top view can be incredibly helpful.
If drawing isn't your thing, that's okay too. Describing your idea in writing works, as does pointing to similar objects and explaining what's different about your vision. AI can also help with descriptions and image concepts.
Measurements Matter (For Functional Parts)
If your project is functional—like a replacement part or something that needs to fit in a specific space—measurements are critical. Use a ruler, tape measure, or calipers if you have them. Include dimensions like length, width, height, and any hole diameters or spacing between features.
For artistic projects like figurines or decorative items, exact measurements matter less. You might just say "about 6 inches tall" and that's perfectly fine.
Reference Images Are Your Friend
Pictures speak louder than words. If something similar to your idea already exists, send photos or links. Even if it's not exactly what you want, you can explain what you'd change. "Like this, but smaller" or "similar shape, but with a hole here" gives designers a huge head start.
Photos of the space where the object will be used, the parts it needs to connect to, or the problem you're trying to solve all provide valuable context.
Define the Function
What is this object supposed to do? Knowing the purpose helps designers make smart decisions about wall thickness, material choice, structural design, and even which modeling approach to use. A decorative item has very different requirements than a tool that needs to withstand daily use.
Will it bear weight? Be exposed to water or sunlight? Need to flex or stay rigid? These details influence every aspect of the design and manufacturing process.
Think About Materials (Or Ask for Guidance)
You don't need to be a materials expert, but it helps to share what environment your object will live in. Outdoor use? High temperatures? Contact with skin? A good designer will recommend the right material based on your needs.
Common 3D printing materials include PLA, which is great for decorative items and prototypes, PETG, which is stronger and more heat-resistant, ASA, which is ideal for outdoor use, and TPU, which is flexible for grips and cushions.


What to Expect When Working with a 3D Designer
If you've never worked with a 3D design professional before, here's what a typical process looks like:
Initial Consultation: You share your idea, sketches, measurements, and reference images. The designer asks clarifying questions to fully understand what you need.
Quote and Timeline: Based on complexity, you'll receive a price estimate and expected turnaround time.
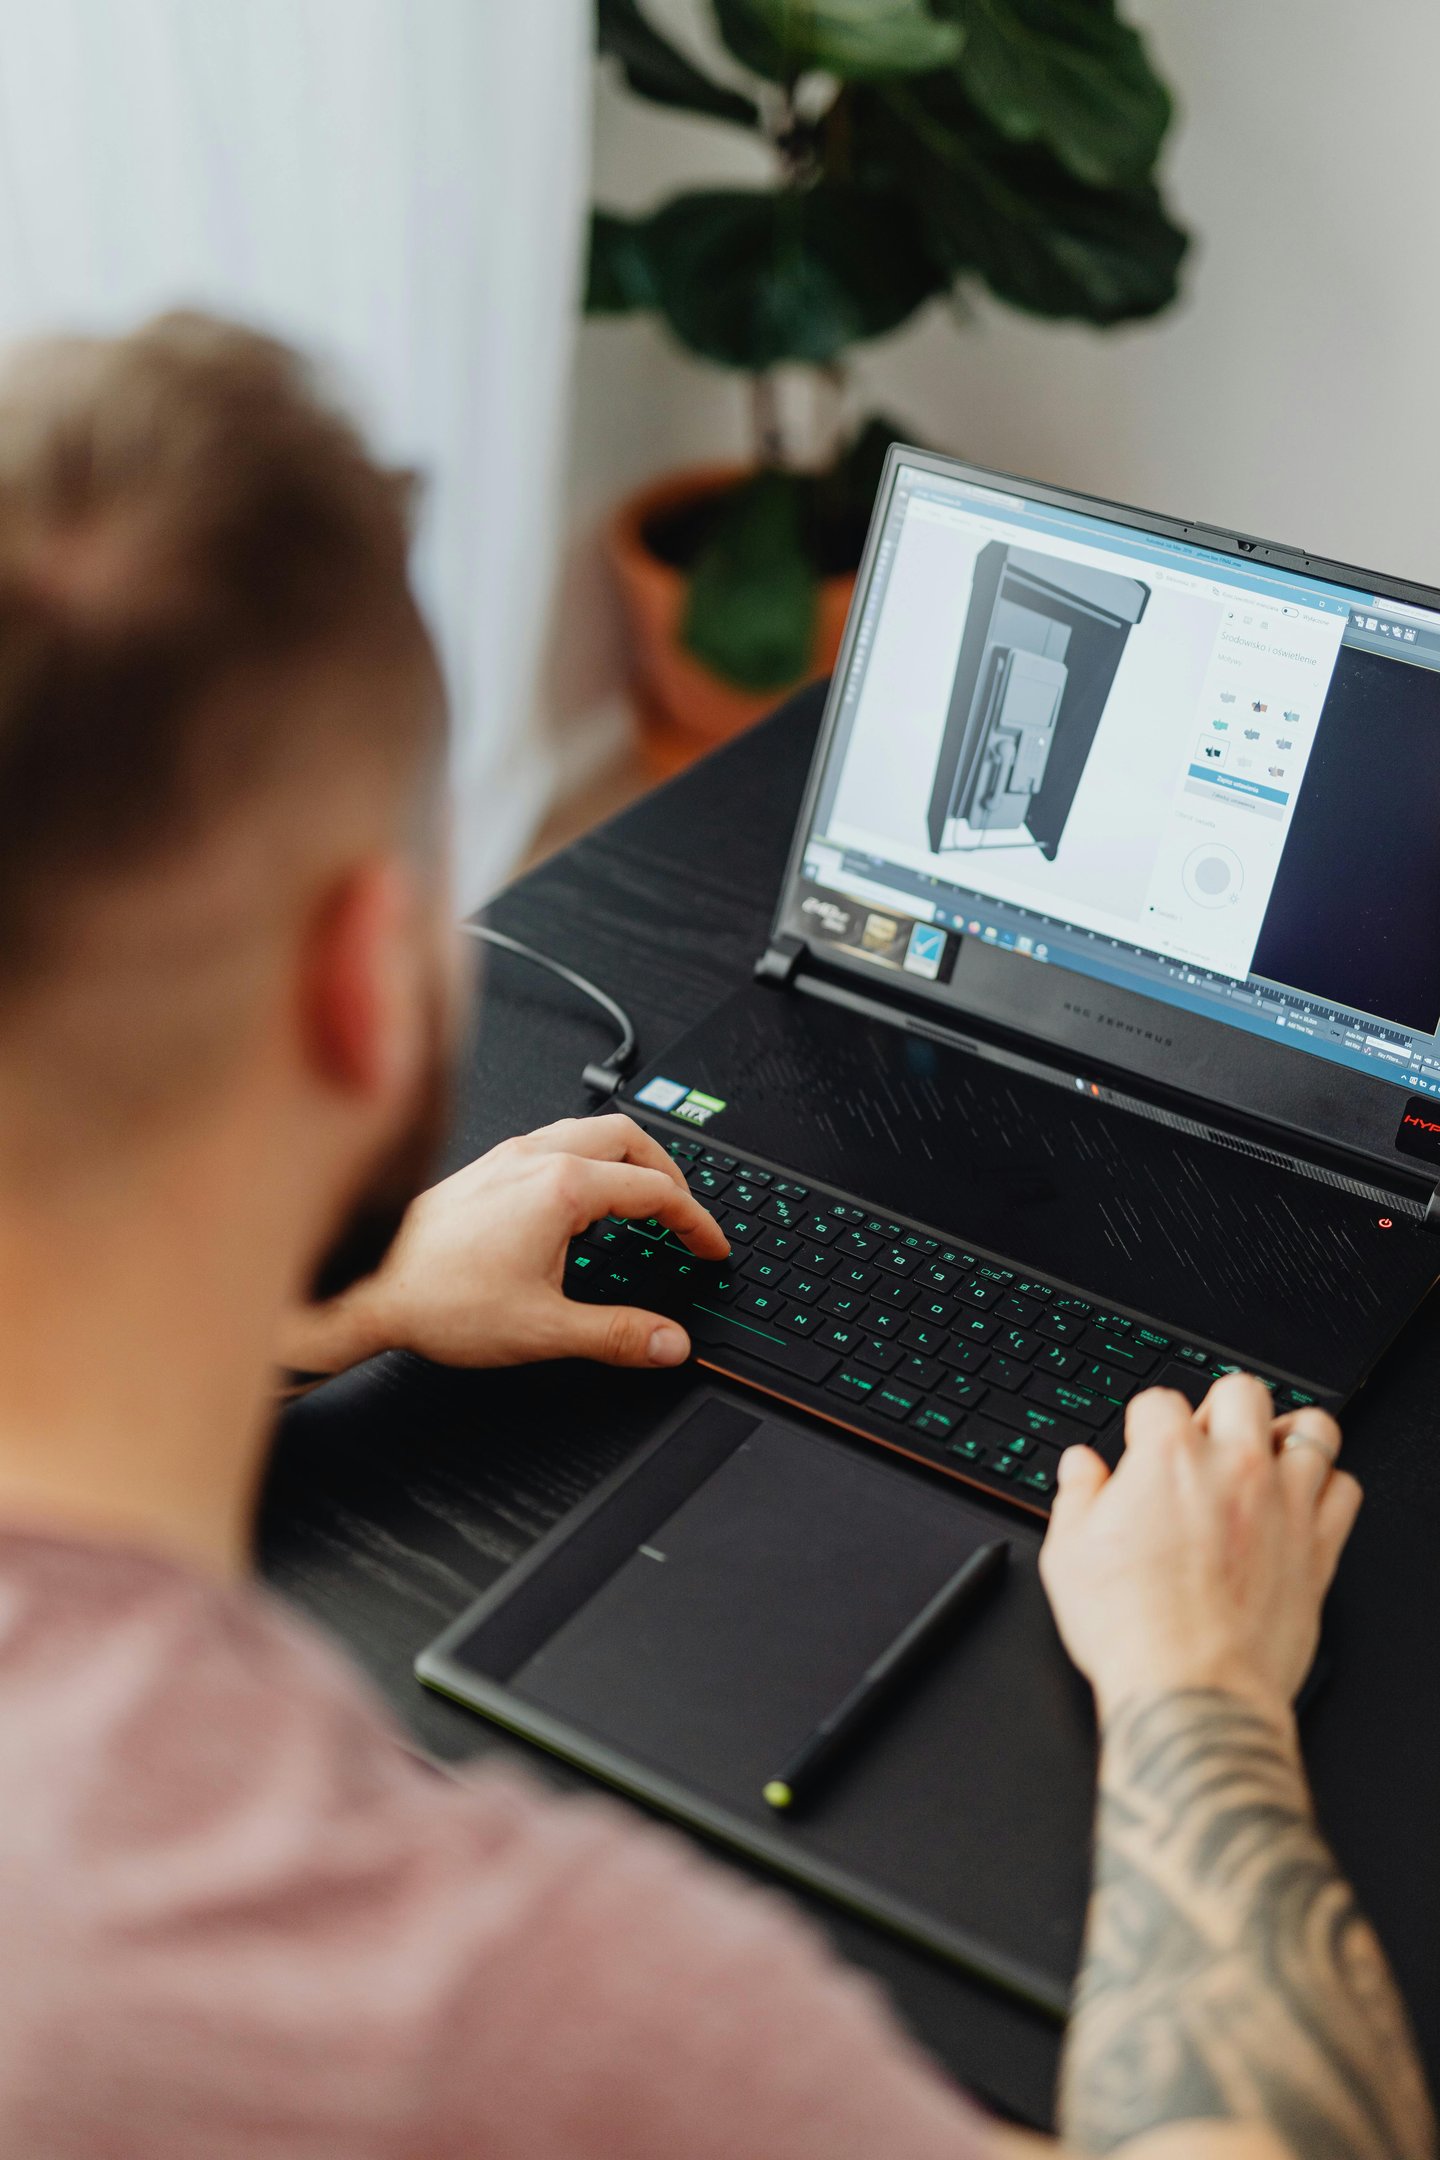
Design Phase: The designer creates your 3D model using the appropriate software—whether that's CAD for mechanical parts, Blender for artistic pieces, or sculpting tools for detailed figurines. You may receive preview images or renderings for approval before printing begins.
Revisions: Most designers include a revision round. If something isn't quite right, adjustments can be made before the final print.
Printing and Delivery: Once approved, your object is printed, quality-checked, and shipped to you.
The best designers will guide you through each step, explain your options, and make sure you're happy with the result before anything is finalized.
Ready to Bring Your Idea to Life?
You don't need to be an engineer, artist, or tech expert to turn your idea into reality. You just need someone who understands the technology and knows how to translate your vision into a physical object.
At DIVO3D, we specialize in taking ideas—from rough napkin sketches to detailed concepts—and turning them into real, functional objects. Whether you need a precision-engineered replacement part, an artistic figurine, a prototype for your invention, or a one-of-a-kind solution, we have the tools and expertise to make it happen.
Get started today: Send us your idea, sketches, photos, or questions. We'll walk you through the process and provide a free quote. No technical expertise required—just your idea and a willingness to see it come to life.
Services
3D printing, 3D custom designs and 3D scanning in the PNW Washington State.
Contact
divo3dstudio@gmail.com
(971) 248-5256
© 2026. All rights reserved.